Meshtastic Solar Node Build
We can build one of these nodes for you for $100. If you are like us and love building things, then read on!
In the parts list below we’ve placed both options for the battery. You can go either with a LiPo pack, or use 18650 batteries. We recycle and collect 18650 batteries out of all sorts of things and reuse them for all sorts of projects like these. So I’ll provide both options. If you need batteries, we always have them.
The line items sometimes come in packs. The cost is divided by what you actually need. So your end price will be more initially, but if you are building more than one than it all comes out in the wash, so to speak.
We generally have the smaller ancillary components in stock, like the 18650 batteries, battery holders, and connectors. So if you don’t want to buy a pack, feel free to ask.
Part List:
| Part No | Description | Qty | Price | Link |
| RAK4631-9-SM-MESH-STARTER | WISBLOCK MESHTASTIC STARTER KIT | 1 | $22.87 $34.97 | digikey rokland |
| 5.8 dBi N-Male Omni Outdoor 915 MHz Antenna kit | 1 | $34.99 | amazon | |
| U.F.L1 to N Type Female bulkhead connector x 2 | 1 | $4.50 | amazon | |
| Outdoor Electrical Box Waterproof IP67 6X6 | 1 | $18.88 | amazon | |
| 5V 6W Solar panel | 1 | $11.99 | amazon | |
| RAK19007: JST ZH 1.5mm Solar Connector x 10 sets | 1 | $0.80 | amazon | |
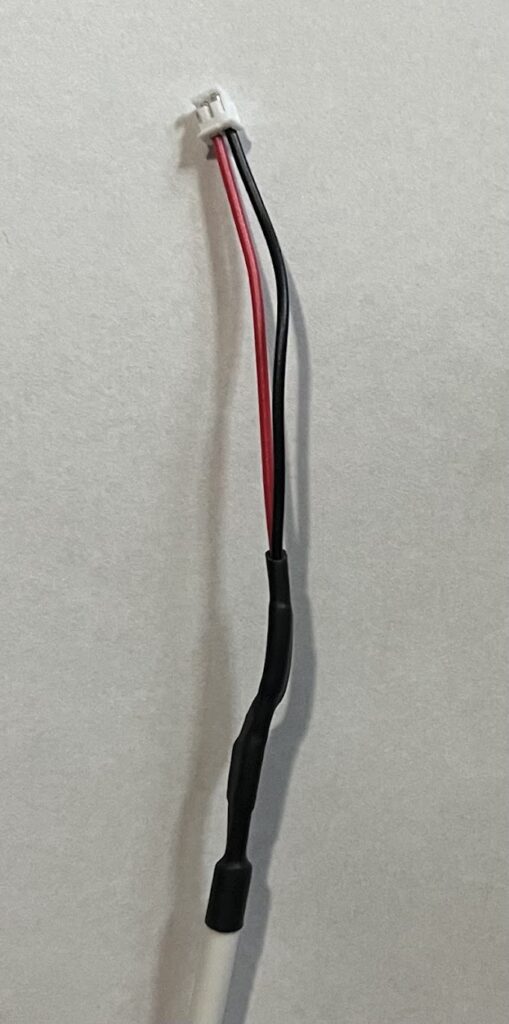
| RAK19007: JST PH 2.0mm Battery Connector x 100 sets | 1 | $0.17 | amazon | |
| 5/8 x 1 x 1/8 rubber washer / gaskets | 1 | $1.00 | amazon | |
| M2.5 x 6mm standoffs | 2 | $0.20 | amazon | |
| USB C Extension Cable 0.3FT 2Pack | 1 | $5.52 | amazon | |
| 18650 battery holders x 5 | 1 | $2.00 | amazon | |
| OR | 3.7v 10000mAh Li Battery with PH2.0 Plug | 1 | 22.49 | amazon |
Amazon list containing these and other components: https://www.amazon.com/hz/wishlist/ls/PJDHSKGLGYSM?ref_=wl_share
Watchout!: The JST ZH 1.5mm and 2.mm connectors are not a standard. So depending on what you purchase the polarity may be backwards. This is particularly true of the battery packs. You’ll need to swap the pins on the connector so that the polarity matches the RAK board. They do not have polarity protection!
Tools:
- Hole saw / knock out / hole punch
- 5/8 in- bulk head connector on the top
- 3/4 in or 7/8 in- for the cable gland at the bottom. Verify before you drill!
- 5 mm socket for the standoffs
- 00 Phillips screw driver for the standoffs
- Wrenches to tighten the antenna bulkhead connector
- Wire strippers for 20 AWG (depending on wire and connectors)
- Soldering gun and supplies
- to wire on the ZH connector to the solar panel
- and the PH connector and wiring for the 18650 battery holder
- along with 3/64x, 3/32×1 and 1/8×1 heat shrink tube
Build:
- Solder the ZH to the solar panel. I cut off about 12 in of the solar cable. Verify the polarity!
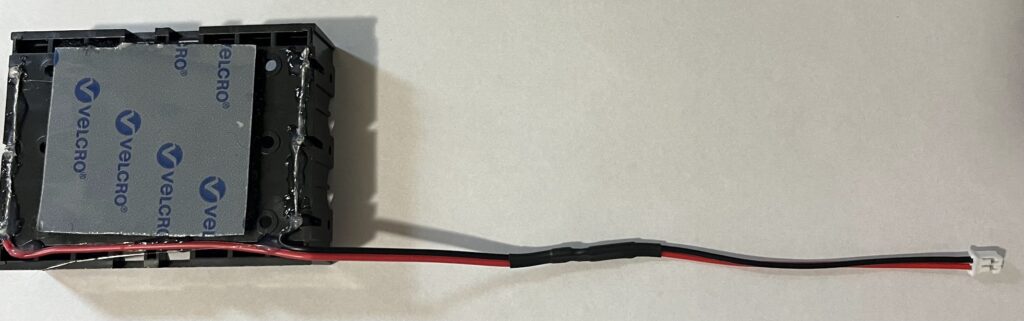
- Wire up the 18650 battery pack if you chose to use those, and solder on the PH connector. Verify the polarity!
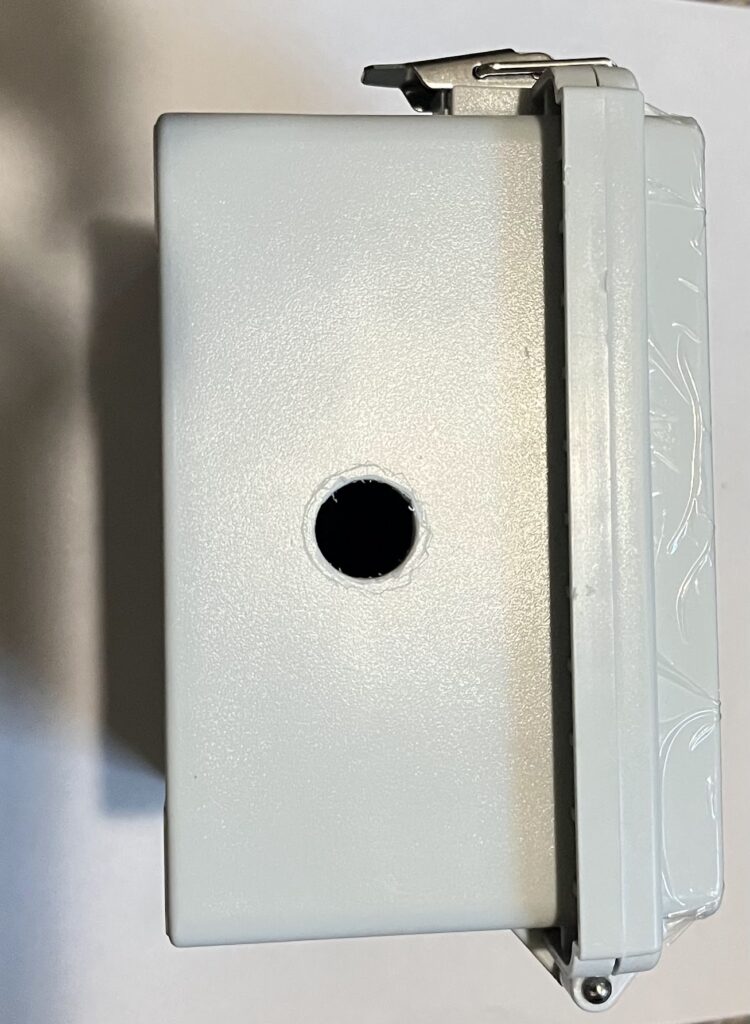
- Drill the holes center top and bottom. Holes are at 2 5/8 in x 1 1/4 in
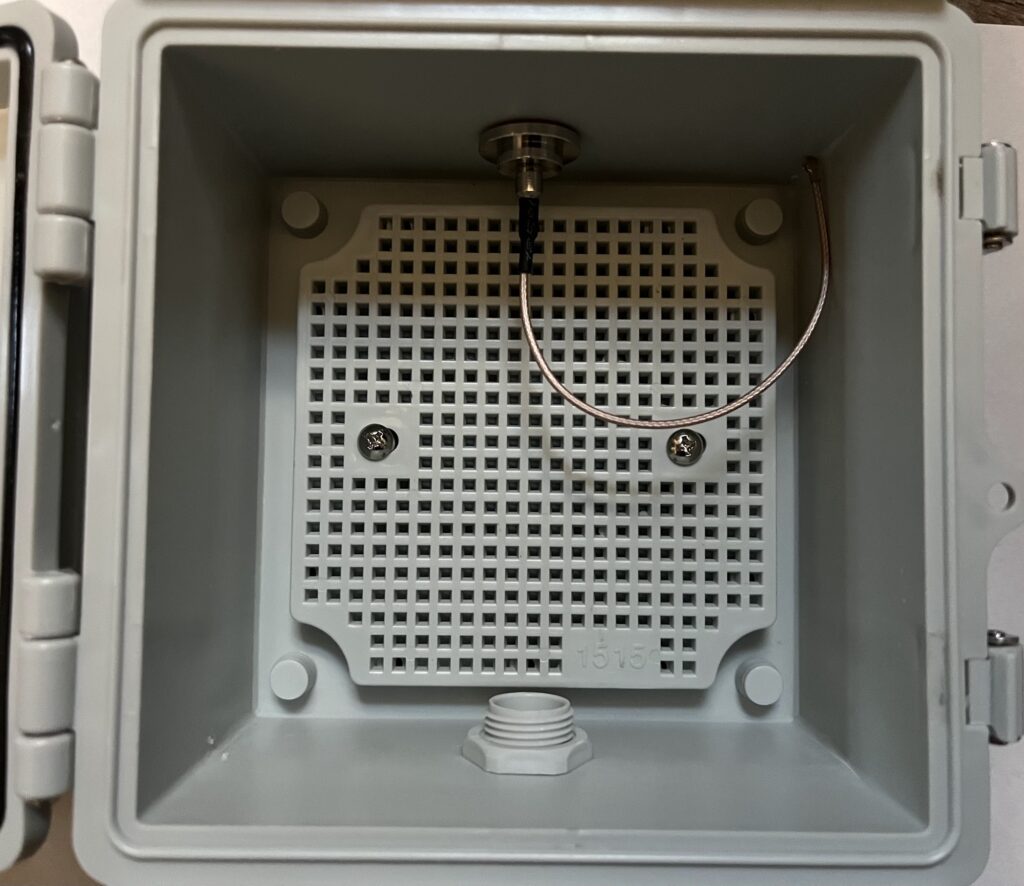
- Install the N to U.F.L. 1 bulkhead and the cable grommet
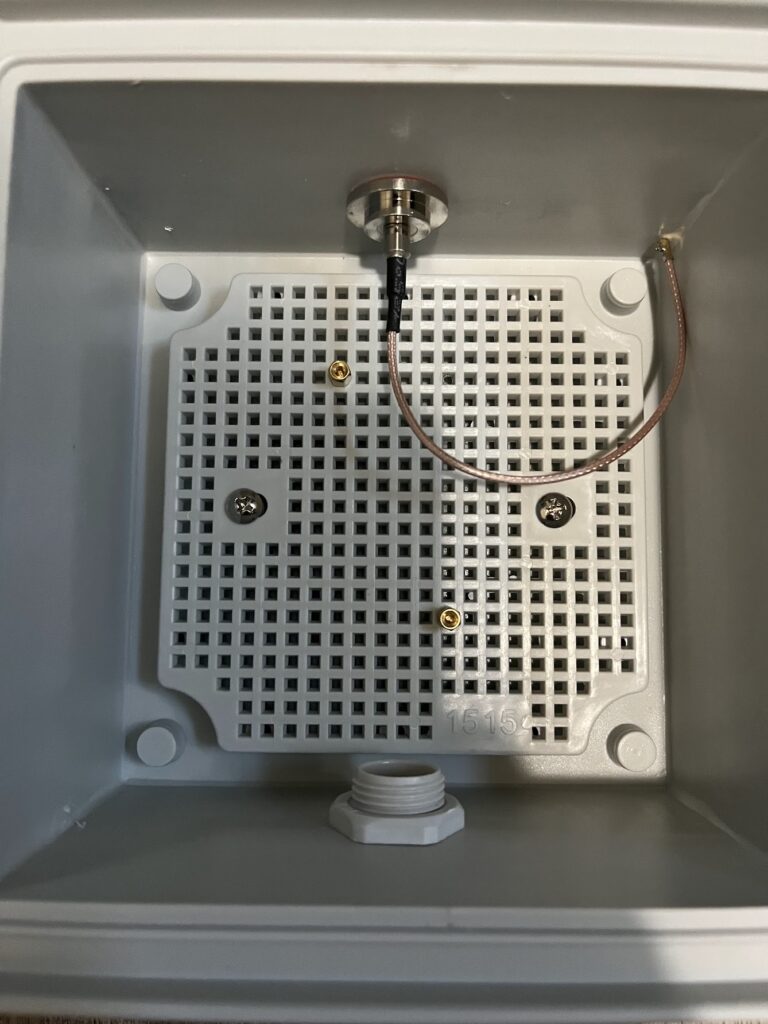
- Placement of the standoffs on the back plate is 8 over 5 down from top left, and 9 over 6 up from the bottom right
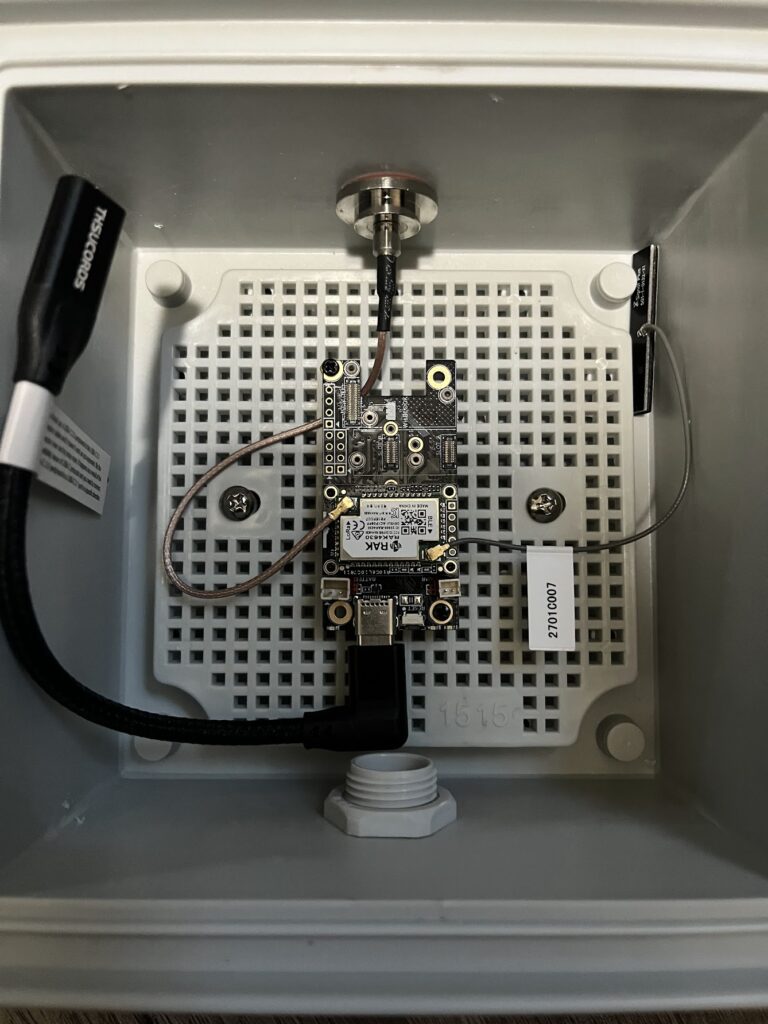
- Install the RAK board
- Attach the U.F.L 1 connector from the bulkhead to the RAK board
- Attach the internal supplied Bluetooth antenna
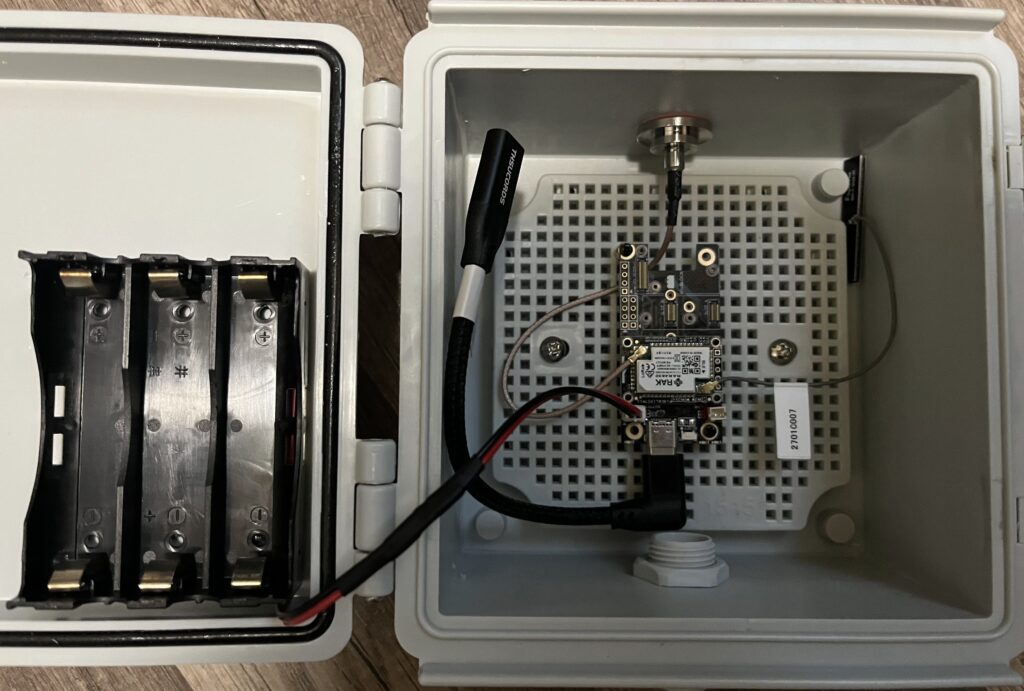
- Mount the battery. NOTE! Never power on the board without an antenna attached!
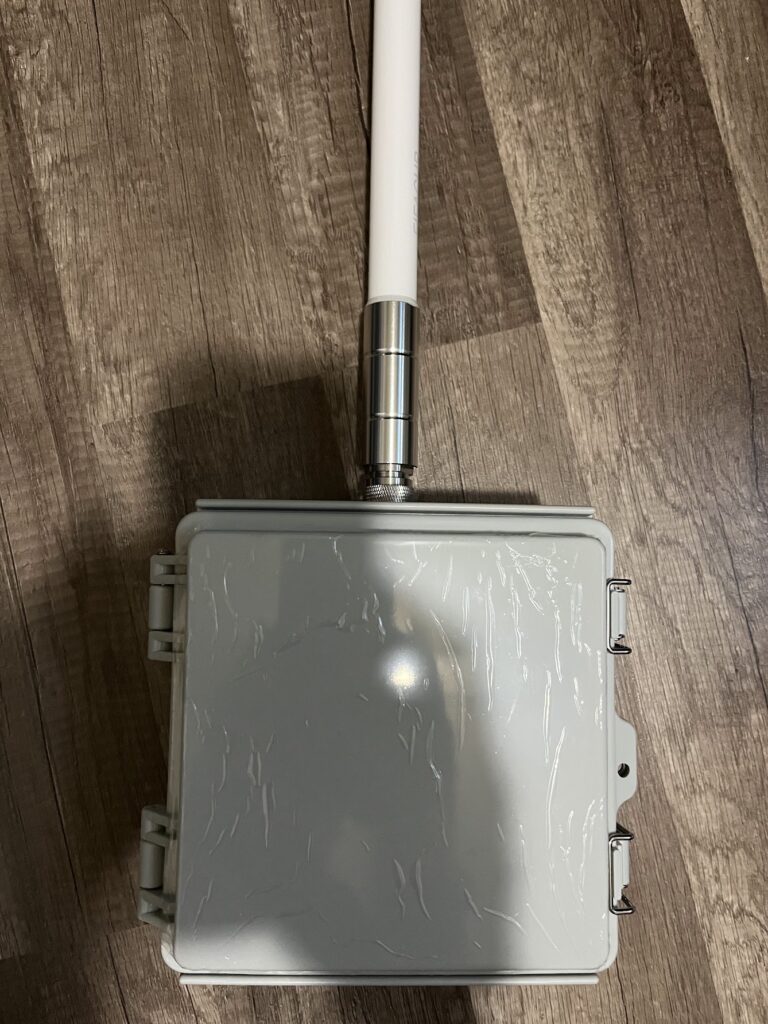
- Attach the antenna
- Plug the battery in, connect the USB C to your computer flash/update and configure!
I generally let the battery fully charge via USB before installing.
In my experience, when ordering the 2.5x5mm stand-offs, I did not realize they came in sets of 1oo! I have 96 left over. This stand-off is threaded in one end, and will require a 2.5M nut to secure. Yes, you can thread a second stand-off above the board to trap it in between, and thread a stand off into the plastic grid to hold it. I found the correct black screws in the WISBLOCK Meshtastics Starter Kit and so did not have to order the additional 3.5x5mm screws that came in a pack of 10. NOTE: Amazon may change the results of your search to a similar item without your knowing it, if their supply is out, or if it isn’t available. BEWARE!
I also found that I did not need the 5/8 x 1 x 1/8 rubber washer/gasket that comes in packs of 10, because a small red gasket comes with the U F L1 to N type bulkhead connector. (In fact, the N connector come in pairs, so I have a spare!) And I don’t see the need for the 18650 battery holder, if you order the flat 3.7v 10000mAh Li Battery… you need double sided mounting tape to stick it onto the wall. Also, no need for the USB C Extension Cable 0.3 ft 2 pack, if you position the WISBLOCK circuit board so that you can access the USB C port on the bottom. It comes with a USB to C programming cable that can be used to power up the unit when programming from your computer (DON’T FORGET TO CONNECT AN ANTENNA FIRST!) and then can be removed or stored. At the time of this writing, I am awaiting my solar panel and external 5.8dbi antenna so I don’t know how many RACK19007 JST PH 1.5 or 2.0 mm battery connectors I will need, but ten packs and 100 packs would seem to be overkill (like the standoffs) unless you’re in a group build mode.